Welcome to themewar and thank you for choosing Boozy, Creative Agency Theme. We are thrilled to have you on board and can't wait to see your beautiful website come to life. Our theme is designed to help you to create your Creative Agency websites and related services. It is Suitable for Creative agencies, Digital Marketing agencies, Marketing agencies, SEO agencies, Business agencies and Corporate related any business Company and much more. This Theme can easily be used for your Marketing Agency Solutions.
Hi, We are here to describe or show how to use Boozy - Creative Agency WordPress Theme the right way. Try to cover up everything. Don't be afraid if we miss something. We are available on mail 24/5 just mail us we will try to solve your issue ASAP. Let's start:
Documentation: Here it is.
License: Some info about the license is noted below.
Files: All files are in here .zip format.
Sample Data: Install all sample data to get a preview like live Theme Demo.
First of all, if you are new to WordPress, I would recommend learning a little bit about it before you get started. Here are some nice Resources on how to get started with WordPress.
Before we start talking about theme installation we should know some facts about wp themes. There is a Boozy package with two themes available. Parent and Child. So we should know about the parent and child theme first.
A WordPress child theme takes the functionality of another theme, named the parent theme. It gives you the possibility to customize an existing theme. Instead of modifying the theme files directly, you can activate the child theme and work within it. All customizations are stored in the child theme and anything in the child takes priority over the parent. So if the same file exists in both child and parent, the file from the child will control that aspect of the theme. Working with child themes, your customizations are safeguarded from future upgrades because you only upgrade the parent theme, which you never edit, while the customizations are protected in your child theme which you don’t upgrade.
Why use Child Theme?
Safe Updates. You can easily modify your website using child themes without ever changing the parent theme. When a new version of the parent theme appears, you can safely update it as all your modifications are saved in the child theme. Easy to Extend. A child theme has great flexibility. It does not require writing a lot of code. You can modify only those template files and functions that you need.
When you install one of our Boozy themes you must upload both Boozy parent and Boozy child theme folders to /wp-content/themes/ but you should only activate the Boozy theme via Appearance -> Themes.
Here are 2 ways to install Boozy theme in your WordPress. Details are noted below:
FTP Upload:
Unzip your downloaded package.
Open up your FTP manager and connect to your hosting
Browse to wp-content/themes
Upload the Boozy & Boozy child in the theme folder
Log Into WordPress and go to Appearance > Themes
Find the Boozy or Boozy child Theme and click activate button.
WordPress Upload:
Log into your WordPress backend
Navigate to Appearance > Themes
Click Install Themes
Click Upload
Now you just need to find the "Boozy.zip & Boozy-child.zip" in the Upload folder and hit Install now.
After complete installation click on the active button to activate The theme.
Here is a Boozy theme installation video. Hope this one will help you. I am going to follow the "FTP Upload" method. I already uploaded the theme in my wp-content/themes/ folder. Uploaded both parent and child themes. Let me show you:
In Boozy we used 7 plugins. 6 plugins are required and 1 plugins are optional. You must be installed them before import dummy content.
Elementor -> Used for Visual Page Builder. (*)
Kirki -> Used for Customize options and Theme customizations. (*)
Boozy Assistance -> Used for all custom post types and Boozy Features. (*)
Revolution Slider -> Used for all Hero slider. (*)
Unyson -> Used for Dummy Installation and Content Backup. (*)
Contact Form 7 -> Used for contact form. (*)
Mailchimp For WP -> Used for Mailchimp Subscription.
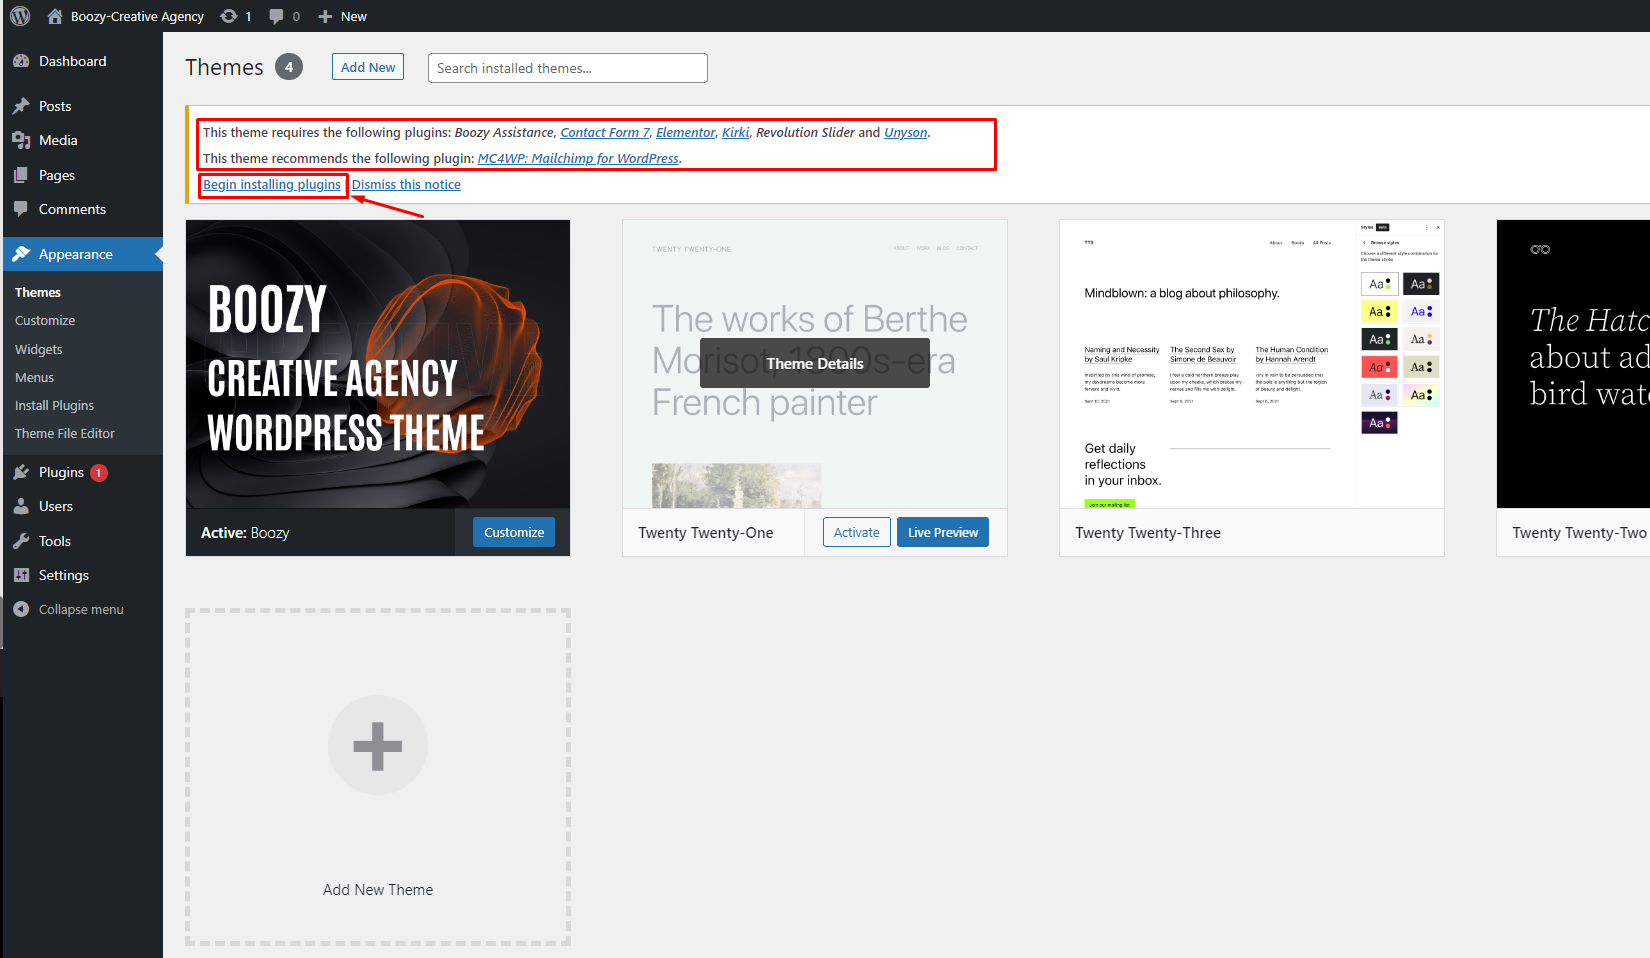
Let's talk about the installation process. Once you installed & Active the Boozy theme you will see a notification in your WP dashboard. Like this:
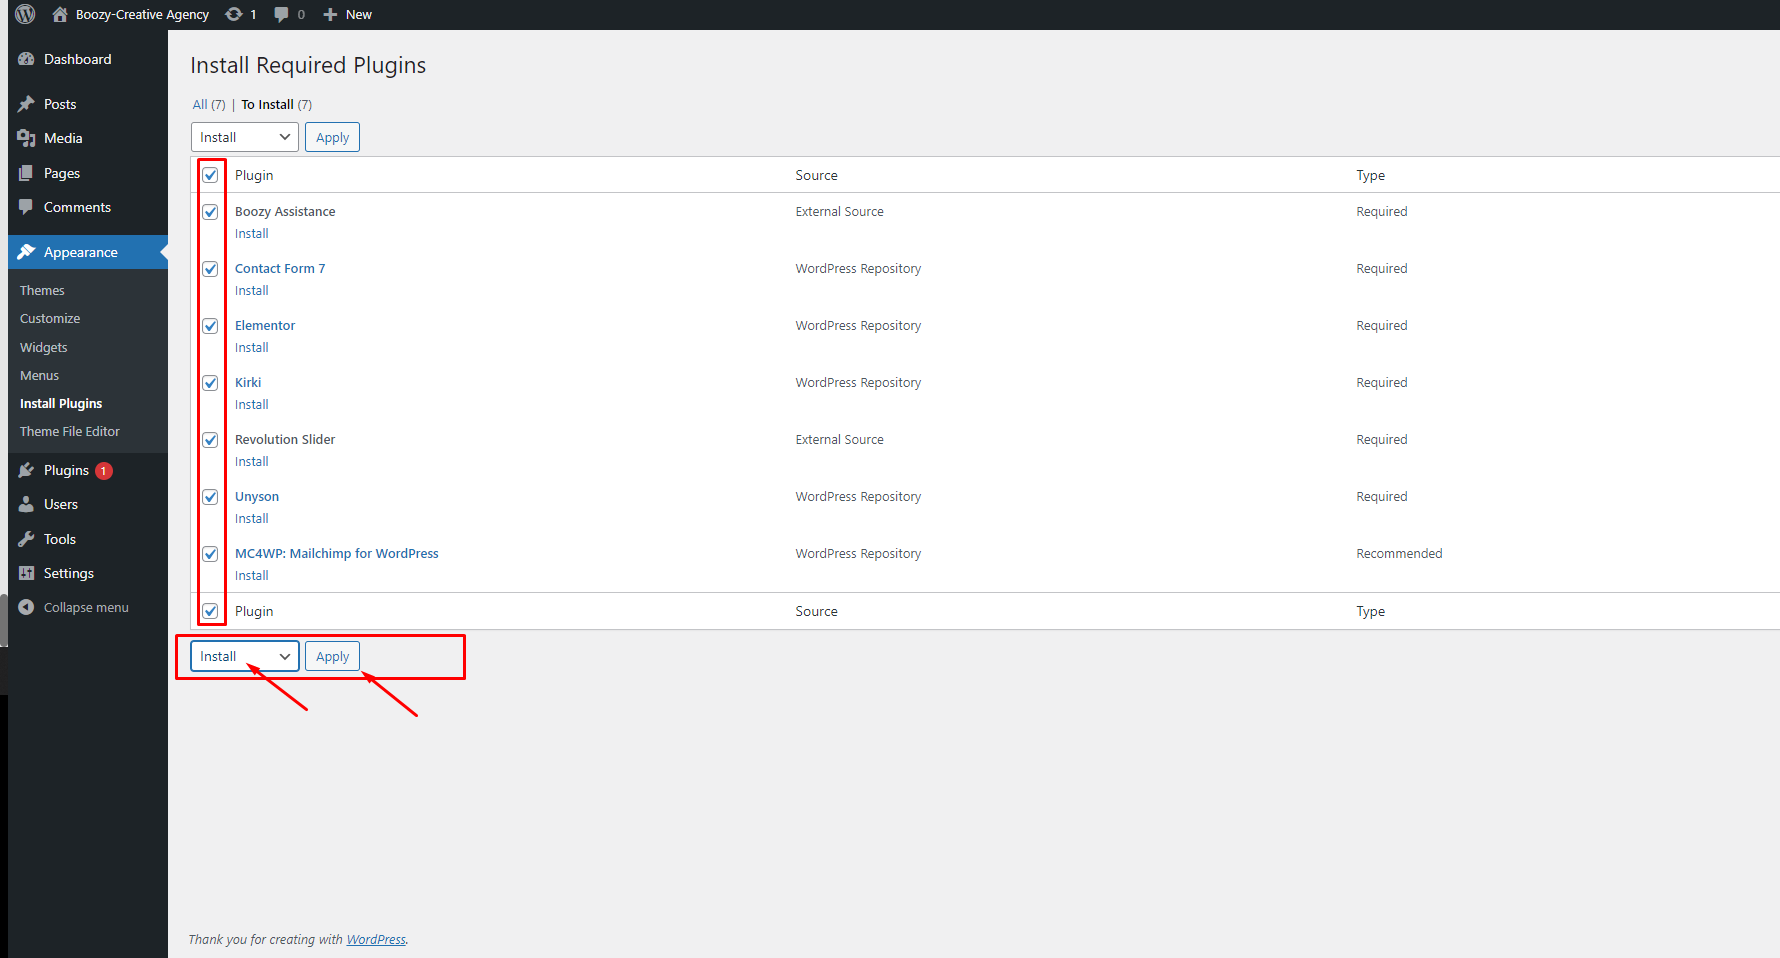
Click on Begin Installing Plugins link that is red-marked in the prev screenshot. You will get this window:
Select all plugins by checked all checkboxes. Select 'Install' from the bulk action dropdown. Then click on Apply button and wait. Once all plugins get installed please Active all of them and Install Unyson Extension for Dummy upload. Here is a small Screencast.
If you still can't figure it out then please mail me at [email protected]. I am ready to help you.
It's easy to setup blog page and single blog page. First insert some blog items under "Blog Posts" menu and then create a page. Set that page as your post page from Settings -> General. Configure blog page style under Appearance -> Customize -> Theme Options -> Blog Settings. That's it. Lets take a tour->
Blog Listing Page Settings:
Single Blog Page Settings:
If you still can't figure it out then please mail me at [email protected]. I am ready to help you.
It's easy to create a service page. You just need to create a page with the given name, and publish This page. Then edit it with Elementor and insert content. It's give you full freedom.
Services Details:
It's easy to add new service items. Create a service Item you need the service title, service icon, and Service Excerpt content, and then publish this item. If you want you can build a Service page with Elementor. Here is a small screencast:
If you still can't figure it out then please mail me at [email protected]. I am ready to help you.
It's easy to create a Portfolio page. You just need to create a page with the given name, and publish This page. Then edit it with Elementor and insert content. It's give you full freedom.
Portfolio Details:
It's easy to add new Portfolio items. Create a portfolio Item you need the portfolio title and publish this item. If you want you can build a Portfolio page with Elementor. Here is an small screencast:
If you still can't figure it out then please mail me at [email protected]. I am ready to help you.
Navigate Appearance -> Customize -> Theme Options -> Header Settings here you will find all settings related header. And under Header Styling you will find all style related settings. In bellow screencast i will show all details about header settings:
If you still can't figure it out then please mail me at [email protected]. I am ready to help you.
Navigate Appearance -> Customize -> Theme Options -> Footer Settings here you will find all settings related footer. And under Footer Styling you will find all style related settings. In bellow screencast i will show all details about footer settings:
If you still can't figure it out then please mail me at [email protected]. I am ready to help you.
Appearance -> Customize -> Theme Options has lots of settings. All of those are easy to setup. We created a video with all other settings those are not explore yet. Hope that will help you.
If you still can't figure it out then please mail me at [email protected]. I am ready to help you.
In some wp default page's does not have option to add extra content or design sections. Pages like blog, shop, archive etc. That's why we created a post type called "Blocks". First you need to create a block with elementor under "Blocks" menu. Then you have to assign it where you want to show from theme option panel under Appearance -> Customize -> Theme Options. Lets take a look on small screencast:
If you still can't figure it out then please mail me at [email protected]. I am ready to help you.
First of all, I wanna thanks to all authors who made my task easy. I wanna give them full credit. Without their scripts, It will really be very hard to build such a beautiful theme.
Once again, thank you so much for purchasing our theme. As we said at the beginning, we are glad to help you if you have any questions relating to this theme. Just contact us via email at [email protected]. And please do not forget to rate this theme! :)